Monday, January 31, 2011

Light, Exposure, Manual Settings

Since this is the first month of Technique Twelve, I am still trying to figure out how to describe the technique I am attempting to work on each month. Rather than simply posting the various camera settings I think I will bore you with an explanation of my thinking/mission for each month and go from there.

For January I was trying to work on using manual settings to play with exposure and lighting. Specifically, I was hoping to become comfortable enough with the endless options on my camera dials so that I could successfully get the image I wanted without having to resort to 'auto' settings or flash photography. I was only moderately successful. While I do feel more comfortable with some of the settings, I am by no means fully confident yet. I am hoping as I play this game over the course of the coming year, I will be able to look back and see that I have indeed become satisfactorily proficient by year end! So on to my submissions for January:

Beside the obvious exposure challenges of the above picture, I had an added bonus of a weird green reflection which I tried to remove using photoshop. While I got rid of most of it, I am not totally satisfied with the end result. A bit of a learning curve there as well, so something else to work on over the coming year. Perhaps some research will show a simplier, tidier way?


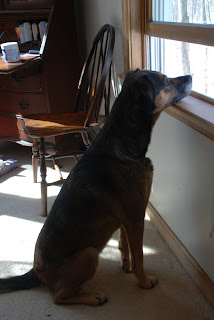
While the above picture is pretty ordinary (and boring) if taken with all the auto settings on my camera, it was a bit of a challenge for me with the manual settings. Same with the one below. The bright snowblind outside the window and the sun streaming in, combined with dark of the desk & Mac's coat were more challenging than I initally realized. By the way, there are squirrels in her yard....the nerve! She would like to eat them all.....


Again, I have taken tons of icicle pictures using the auto settings on my camera, but trying to catch the motion of the drip with the extreme snow blind outside while keeping the exposures correct was a challenge for me. I was pretty psyched that I caught the big drip and a tiny bonus dot...


I am including the above pic simply because I am playing an art game with my sister and had to take a picture of my submission for that game. I used the tripod in a relatively dark room, manual settings, colors stayed true, so a success! :o)

Sunday, January 30, 2011

light, exposure


This one was a simple concept, try to take a picture just at the right moment of the morning - not too light and not too dark. Too dark and my camera makes only grainy pictures. Too light and you wouldn't be able to see Venus. 'Course, you can't see Venus with the picture this small, so some of my intentions got lost in translation (there is a dot, if you look hard enough, diagonally down from and right of center. It's perched just atop the tips of a few delicate branches). The manual settings of my camera allow for selecting the ISO as low as 80 and as high as 1600. I ran out the front door of my house to get this shot... leaving the tripod inside. The light was rising too fast and I didn't want to miss the shot by trying to find the tripod, so I set the ISO at 1600 hoping I could escape a blurred shot. The sacrifice was that the blue sky isn't as richly colored as it looked to my eye, but there was enough texture from the clouds... and it is what it is.


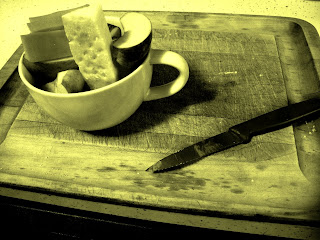
Breakfast. Maybe not of champions, but of... photogamers. My intention was to get a crisp shot and I did have to use the tripod to get it. At this point my use of manual settings is... intuitive manipulation. For this I started with the ISO setting (for some reason 800 ISO was giving me the look I wanted. I don't understand this stuff I just spin dials until the screen shows me what I like). From there I played with the f-stop and manual focus... again, until it looked good to me. As it turned out with this shot the image of sliced red apple, cheddar cheese, Parmesan cheese, bright white cup, red handled knife all set on a slightly grease stained cutting board... just didn't look that interesting once I downloaded the shot to my computer. Hence the tweaking - sepia was finagled by using photo editing software.


I took shot after shot on this day... the hoar frost is so attractive to me it was fun to play with what was and wasn't in focus, what was or wasn't in the background, what was and wasn't in the bright light. Besides playing with focus for this shot I used a low ISO and then played with the shutter speed to see how richly I could draw out the drama. Speeding up the shutter speed just a touch faster than what the camera indicated (green light) I got the balance of richness without being too dark that intrigued me most.


I was walking the dogs in the back yard saw this one teensy little leaf resting on the snow. I herded the dogs away hoping they wouldn't pee too close to it! After puppydogs were done and back inside I pulled out the trusty ol' camera and dove into that intuitive manipulation (aka: manual settings exploration). For this shot I did end up editing out some of the blue. No matter what dials I manipulated, spun, twisted and turned I couldn't get the snow to look the way it looked to my eye. Any advice?


My main effort here was to allow my obsession with crispness to be put on hold. The sky was layered with clouds and the sun occasionally pierced a layer, blindingly. I admit that I did initially tweak this to intensify the dark ridge of trees at the horizon. But the crispness that I could create ended up challenging me. What is my fascination with hard edges of black and white? So I restored the original (I did take it as B&W on the camera) and eased into allowing this to be just as it is. Fast shutter speed, 200 ISO. A dark shot allowing "cloud drama."

Followers